
Wordpress Plugin Installation
Overview:
In order for the bot to be live on the client’s website for testing (and for go-live), we need to embed the bot onto their website from within their Wordpress dashboard. See instructions for installation and settings below.
Instructions:
- Log into the client’s Wordpress.
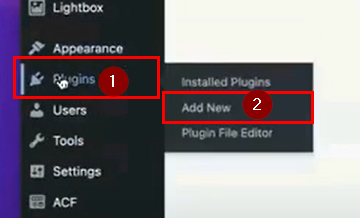
- Go to Plugins and select Add New.
- Search for “Staffing Engine”.
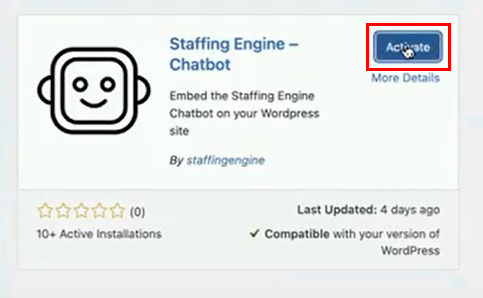
- Click Install Now.
- Click Activate.
- Locate the Staffing Engine - Chatbot Plugin in the list of installed Plugins, and click on Settings. (Alternatively, it can also be accessed from the sidebar under Settings > Staffing Engine.)
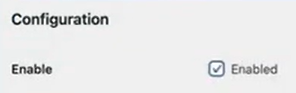
- Under the Configuration settings, Select the Disabled box to change it to Enabled.
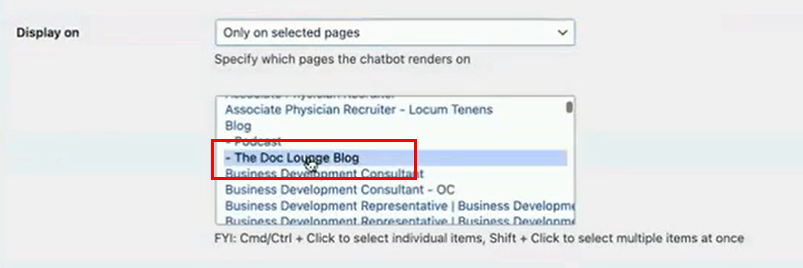
- Click on Display on and select Only on selected pages.
- For testing purposes only, choose the page(s) that doesn’t get a lot of website traffic so that the internal testing team can access the bot and provide feedback during testing. This can be changed later to all pages.
- Obtain the Bot key and plug it into the Bot key field.
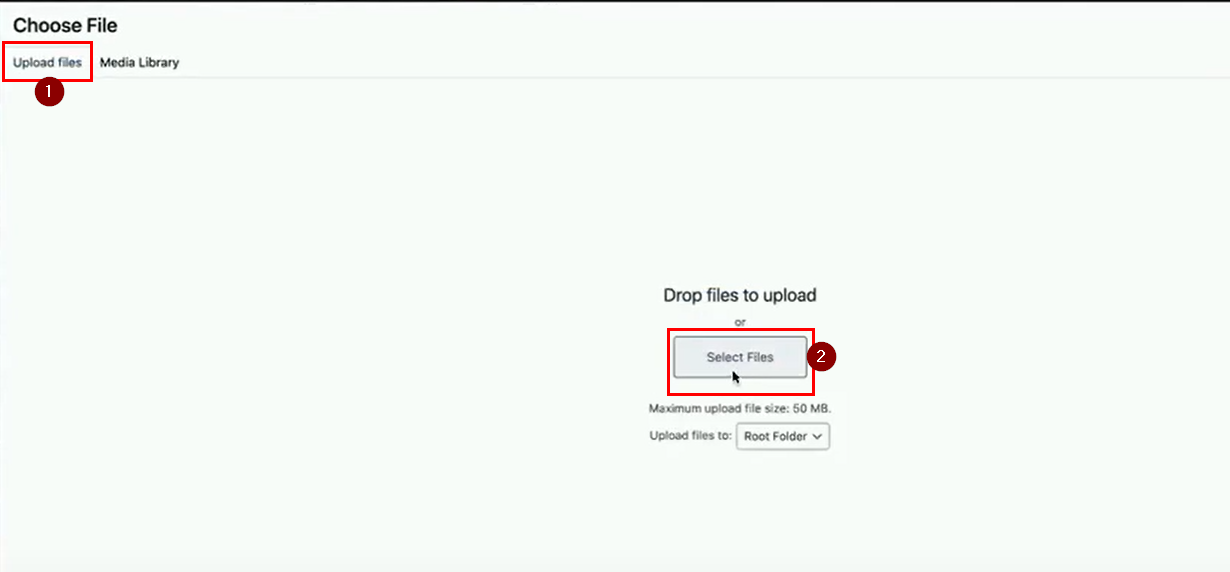
- Scroll down to Thumb logo and click Upload. This is where we will upload the client-approved bot icon.
- Go to the Upload files tab and attach the image file.
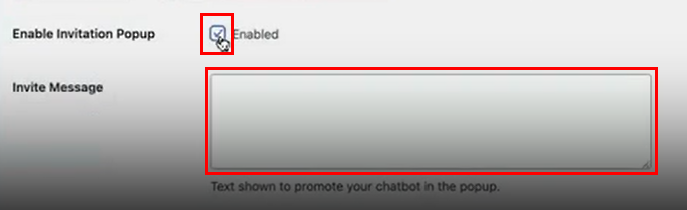
- OPTIONAL - If the client would like a Welcome Message to pop up on the top of the bot icon, select the Enable Invitation Popup box and include the text of what the Welcome Message should say in the Invite Message field.
- Staffing Engine recommends Enabling Auto Expand, with a Auto Expand Delay of 5-15 seconds.
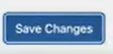
- Click Save Changes.
- Go to the web page that the bot is set up on to confirm that the bot is visible. Share the link with the client’s internal testing team for testing. Testing feedback should be recorded in the Bot Designer Document that is shared with the client.


Debugging Tips:
If the bot doesn't show up at this point, it's possible that the WordPress site is using some sort of caching or "speed boost" plugin. If that's the case, our plugin folder will need to be allow-listed in whatever tool they are using.
Configuration depends on the tool, but generally something along the lines of `/wp-content/plugins/staffing-engine-chatbot/public/*` (this would allow any assets we provide with the plugin to bypass things.
If the bot is not showing up, you can try to get a better idea of the problem with the following instructions:
- Open up the browser dev tools (Option+Cmd+i on mac, Ctrl+Shift+I on windows) and search the page for “Staffing Engine Chatbot”. This script usually makes it through other plugins that modify the page. If it doesn’t, double check that the plugin is enabled.

- Search for “se-chatbot.js”, which should be near the end of the <body> element.
- Search for “staffing-engine-chatbot-rwc-defer” and “staffing-engine-chatbot-chatbot-defer”. Both css files should be in the <head> under <link> elements.
Comments
0 comments
Please sign in to leave a comment.